はじめに
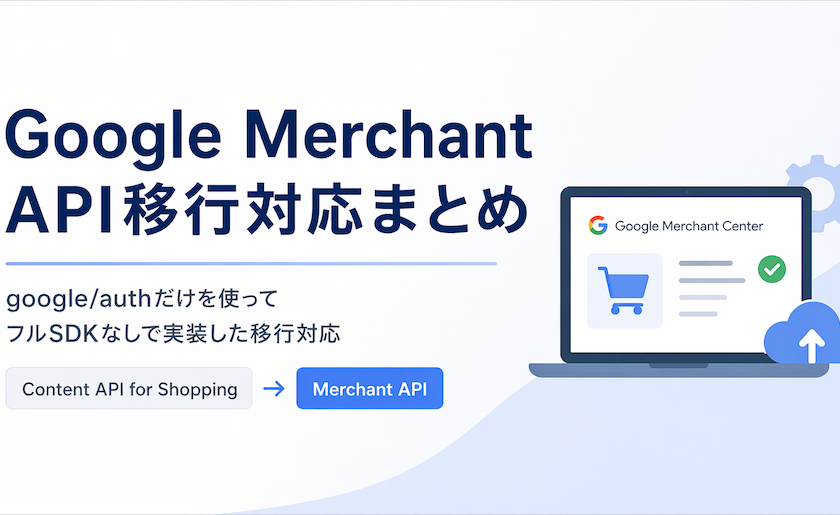
Google Merchant Centerで商品データを連携している場合、これまで利用していた「Content API for Shopping」から、新しい「Merchant API」への移行が必要になっています。
弊社でもECシステムからGoogle Merchant Centerへの商品同期を行っており、今回このAPI移行対応を実施しました。
本記事では、その対応内容と実装上のポイントについてまとめます。
なお、弊社の実装では Google が提供しているフルの公式SDK(google/apiclient)は使用しておらず、認証処理のみ google/auth を利用し、APIリクエスト部分は自前で実装しています。
一般的にはSDKを利用するケースが多いと思いますが、
google/apiclientが重い- 依存ライブラリを最小限に抑えたい
- 挙動をブラックボックスにしたくない
- 必要な機能だけシンプルに扱いたい
といった理由から、このような構成を採用しています。
そのため本記事では、
- google/auth + 自前HTTPクライアント構成での実装
- その前提でのMerchant API移行対応
という観点で解説していきます。
既存実装の構成
移行前は、Content APIを利用して商品データを同期していました。
構成としてはシンプルで、LaravelのQueueを利用した非同期処理です。
- 商品更新時にJobをdispatch
- Google Merchant CenterへAPIリクエスト
- 定期バッチでの再同期も実施
認証については google/auth を利用し、アクセストークンを取得したうえで、Guzzleを用いてHTTPリクエストを直接送信する形です。
$credentials = new \Google\Auth\Credentials\ServiceAccountCredentials(
    ['https://www.googleapis.com/auth/content'],
    json_decode(file_get_contents($path), true)
);

$token = $credentials->fetchAuthToken();
$accessToken = $token['access_token'];
$response = $client->post($url, [
'headers' => [
'Authorization' => 'Bearer ' . $accessToken,
'Content-Type' => 'application/json',
],
'json' => $payload,
]);SDKのラッパーは使用せず、REST APIを直接扱う構成です。
移行対応の全体像
Merchant APIへの移行は単純なエンドポイント変更ではなく、APIの構造自体が変わっています。
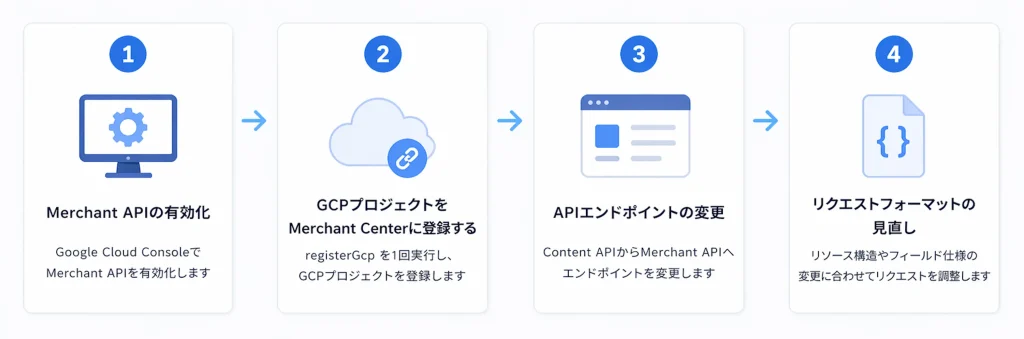
今回の対応で実施した主な内容は以下の通りです。
- Merchant APIの有効化
- GCP プロジェクトを Merchant Center に登録する
- APIエンドポイントの変更
- リクエストフォーマットの見直し
対応内容
Merchant APIの有効化
Google Cloud Consoleにログインし「APIとサービス」> APIとサービスを有効にする > Merchant APIを検索し有効化します
GCP プロジェクトを Merchant Center に登録
registerGcp を 1 回実行します。公式の登録エンドポイントは下記です。
POST https://merchantapi.googleapis.com/accounts/v1/accounts/{ACCOUNT_ID}/developerRegistration:registerGcp
Authorization: Bearer {ACCESS_TOKEN}
Content-Type: application/json

{
  "developerEmail": "your-admin-email@example.com"
}
developerEmail 自体は省略可能で、省略すると GCP プロジェクトのリンクだけを行います。
APIエンドポイントの変更・リクエストフォーマットの見直し
insert サンプル
$product = [
    'offerId' => 'product_code',
    'contentLanguage' => 'ja',
    'feedLabel' => 'JP',
    'productAttributes' => [
        'title' => 'title',
        'description' => 'description',
        'link' => 'https://xxxxx.jp/items/xxxxx',
        'imageLink' => 'https://xxxxx.jp/image/xxxxx',
        'availability' => 'IN_STOCK',
        'condition' => 'NEW',
        'brand' => 'ブランド名',
        'price' => [
            'amountMicros' => (string) ($price * 1000000),
            'currencyCode' => 'JPY',
        ],
    ],
];

$endpoint = "https://merchantapi.googleapis.com/products/v1/accounts/{$accountId}/productInputs:insert";
$response = $this->httpClient->post($endpoint, [
    'query' => [
        'dataSource' => "accounts/{$accountId}/dataSources/{$dataSourceId}",
    ],
    'json' => $product,
]);
delete サンプル
$productInputId = sprintf('ja~JP~%s', $offerId);
$name = "accounts/{$accountId}/productInputs/{$productInputId}";
$encodedName = str_replace('%2F', '/', rawurlencode($name));
$endpoint = "https://merchantapi.googleapis.com/products/v1/{$encodedName}";
$this->httpClient->delete($endpoint, [
    'query' => [
        'dataSource' => "accounts/{$accountId}/dataSources/{$dataSourceId}",
    ],
]);
SDKを使わない構成について
メリット
- 依存が軽い
- 挙動が明確でデバッグしやすい
- 必要な処理だけ実装できる
デメリット
- API仕様の理解が必要
- 実装コストはやや高い
まとめ
Google Merchant APIへの移行は単純な置き換えではなく、API設計の変更を伴う対応でした。
特にSDKを利用しない構成の場合、API仕様の正確な理解が重要になります。